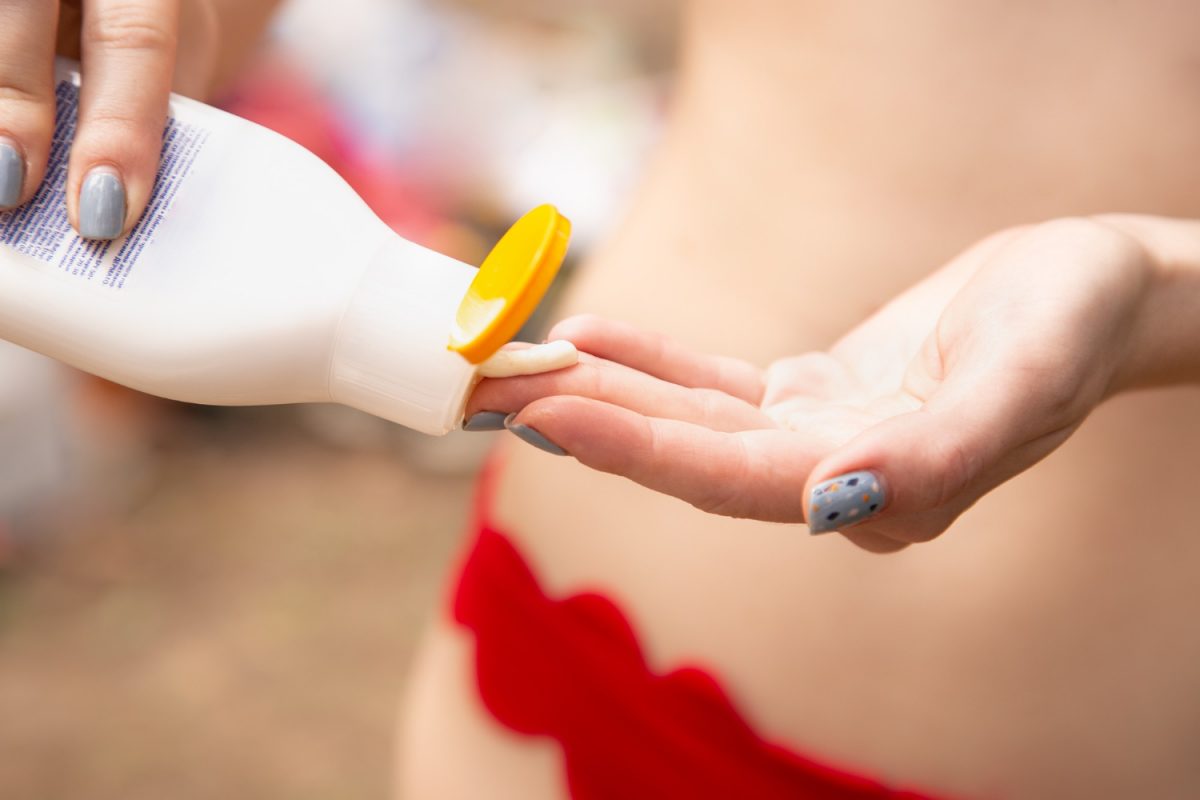
Many people who use self-tanner may do so incorrectly. This is because there are some easy-to-spot mistakes that determine a good-looking tan. What to watch out for when applying self-tanner?
The answer is yes! Not just before applying self-tanner. If you’re going to go out in the sun, it’s important to make sure your skin is well-adjusted, too. Almost every package of self-tanner will tell you that you need to exfoliate.
It’s best to take care of this at least 24 hours before you plan to apply the tanning product. However, keep in mind that the cosmetic you plan to make a scrub with should not contain oily ingredients. They may cause hindered absorption of the self-tanner. Properly chosen peeling will help to exfoliate the skin, which otherwise could cause uneven distribution of color
Skin that is not adjusted properly can misbehave after the product is applied. This often results in spots on the body and uneven color. Also, after scrubbing, make sure to moisturize the skin properly, making the color last longer and evenly distributed over the area where the self-tanner will be used
Ever wonder why self-tanner often comes with a big glove? An even tan is hard to achieve without one! The glove is incredibly useful because by not using it, you can easily stain your hands and the self-tanner doesn’t wash off easily
It makes the process of applying the product evenly much easier. Using a mitt will give you a beautiful, evenly distributed tan that is difficult to achieve using just your hands.
To evenly distribute the product on your skin, apply it directly to the glove, then rub in circular motions on the desired parts of your body. Wait a few minutes to allow the product to be absorbed. The glove should be cleaned according to the manufacturer’s instructions, preferably immediately, since dried self-tanner may cause problems with its thorough cleaning.
These areas are the most vulnerable parts of the body to quick dryness and usually cause a problem. As a rule of thumb, these areas can be darker than the rest of your skin, making it safer to just lightly dab them with the product. Even experienced self-tanners often complain about unevenly distributed tan
Before applying the product, try to moisturize these areas with lotion or cream. The composition of this product should be water-based, so that subsequent application of self-tanner will not cause spots. The process of preparing the skin can be started even a few days before. For exfoliation of dead skin also from elbows, knees and ankles there are special sponges and brushes, used when bathing, when the skin is properly hydrated
Also, do not over apply the product, as it may not guarantee an immediate effect. With reapplication topically, you risk causing stains and uneven color.
This is another process that can cause quite a problem for novices. When spreading a new product, you should test it anywhere on your body to see how it works, preferably a few minutes or hours before you plan to apply it
This is safer than exposing your entire body to an allergic reaction. When applying the product to the rest of your body, it is important to start from the bottom. When applying the self-tanner, you should start from your feet, and make sure to properly protect the edges and bottom of your feet with lotion so they don’t become stained. Start from the top of the feet and gradually and thoroughly spread the product up the body. The direction from bottom to top should be maintained. Circular motions should be used on the abdomen, while horizontal strokes should be used on the neckline and arms
It is also a good idea to have a helper to take care of spreading the self-tanner on the back. Knees and elbows can be left for last, as they only need to be brushed with the product
Źródło zdjęcia: Designed by Freepik