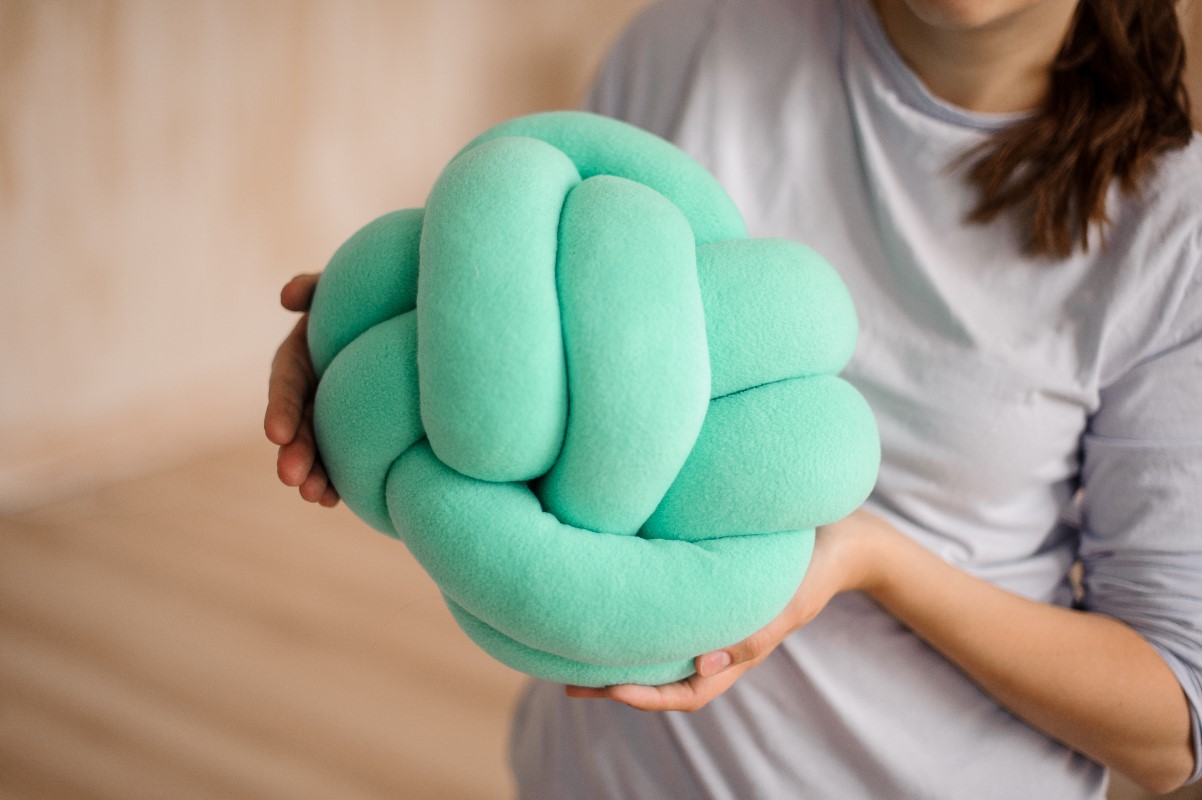
In interior decoration stores, very fashionable knotted pillows will surely catch your attention. They look charming and can spice up our apartment. Check out how to make a knot pillow yourself, without much financial input
Choosing a material to create a knot pillow is half the battle. It should be a thick and durable fabric. Knitwear works best, but choose a thicker version. A better choice will be a tracksuit fabric, suitable for making sweatpants, than cotton for sewing T-shirts, which is thin and will wear out after some time. The fabric can be purchased at a haberdashery store or online store.
>> See also: What to do from a jar? 6 ideas
Making a knot pillow itself is not the easiest task, but certainly the effect will reward us our efforts. First of all, the DIY knot pillow is much cheaper to make than a ready-made pillow in the store. In addition, you will have the satisfaction of knowing that you yourself will make such a beautiful decoration for the bed.
Method
1. Cut the knitted fabric into several strips 12 cm wide.
2. Sew the strips of fabric together to make one strip 6 meters long.
3. Cut out unnecessary reserve, so that it was not visible on the seam.
4. Fold the resulting strip in half and sew together to create a long tunnel.
5. Turn the 6 m long fabric tunnel over to the other side with a long paper tube.
6. Leave the fabric stretched over the tube.
7. Sew one end of the fabric tunnel firmly with a sewing machine.
8. Pull the sewn end of the tube carefully over the tube and then insert the wadding inside the fabric tunnel.
9. Use a piece of batting or a broom handle to make it easier to insert the wadding inside the tunnel
10. Push the wadding to the end of the tunnel, and when it is thoroughly stuffed, tie the other end with thread so the wadding doesn’t escape.
Now the slightly more difficult partremains , that is, tying our “snake” into a knot to create the popular wick pillow.
More and more popular are pillows tied in the so-called pretzel. This tying is one of the easiest to do, so if you are making your first pillow, this would be a great choice
Make a knot on one side of the “snake” so that the end is facing up. Don’t knot the end, just tuck the shorter end underneath the longer end to create a loop. Then, hook the longer end over the protruding end to make it look like a loop as well. The hose should look like a pretzel, and the two loops must cross each other in the middle
>> See also: How to sew a shopping bag?
Then begin to put the longer end between the loops, in the same way as the initial ones. Subsequent repositioning of the “snake” is to tighten the pretzel and fill the free space. The result of wrapping will be a lovely braided pillow in the shape of a cloud. If you have problems with making this knot, in the Internet you can find interesting tutorials, in which you will see how to make a strong and durable knot step by step. When the knot is finished, sew both ends together firmly to prevent the wadding from escaping from the pillow
Two pillows with dimensions of 45×35 cm cost about 30-40 zł. For example, one pillow bought in the store costs up to 60 zł. So it is a huge saving of money. To costs should be added wadding: about 18 zł for one kilogram of filler, thread – 2-3 zł and material – from 12 to 20 zł per running meter.
Photo source: Designed by Freepik